


YarnCo™ NEW DIY Hand Knitting Mill
Original price was: $45.99.$27.99Current price is: $27.99.
- Buy It Now and Get 50% OFF Now!
- Free Shipping for all orders today
- 100% Money-Back Guarantee
- Perfect gift for your friends & family
Customer review:
“I still love my knit nancy, I’ve had it since I was a child but it takes ages to make something and when my friend got a knitting mill for her birthday I had to have one. Its very easy to use and I made loads of stuff for my church craft stall. its paid for it self twice over. loads of my friends are going to buy one now.” – Bluebells. ★★★★★
‘”I’ve given this gadget 5 stars because it works beautifully, BUT, it is fiddly to get going, you need to follow the instructions (however odd they look) carefully” – Summer C. ★★★★★
Instruction:
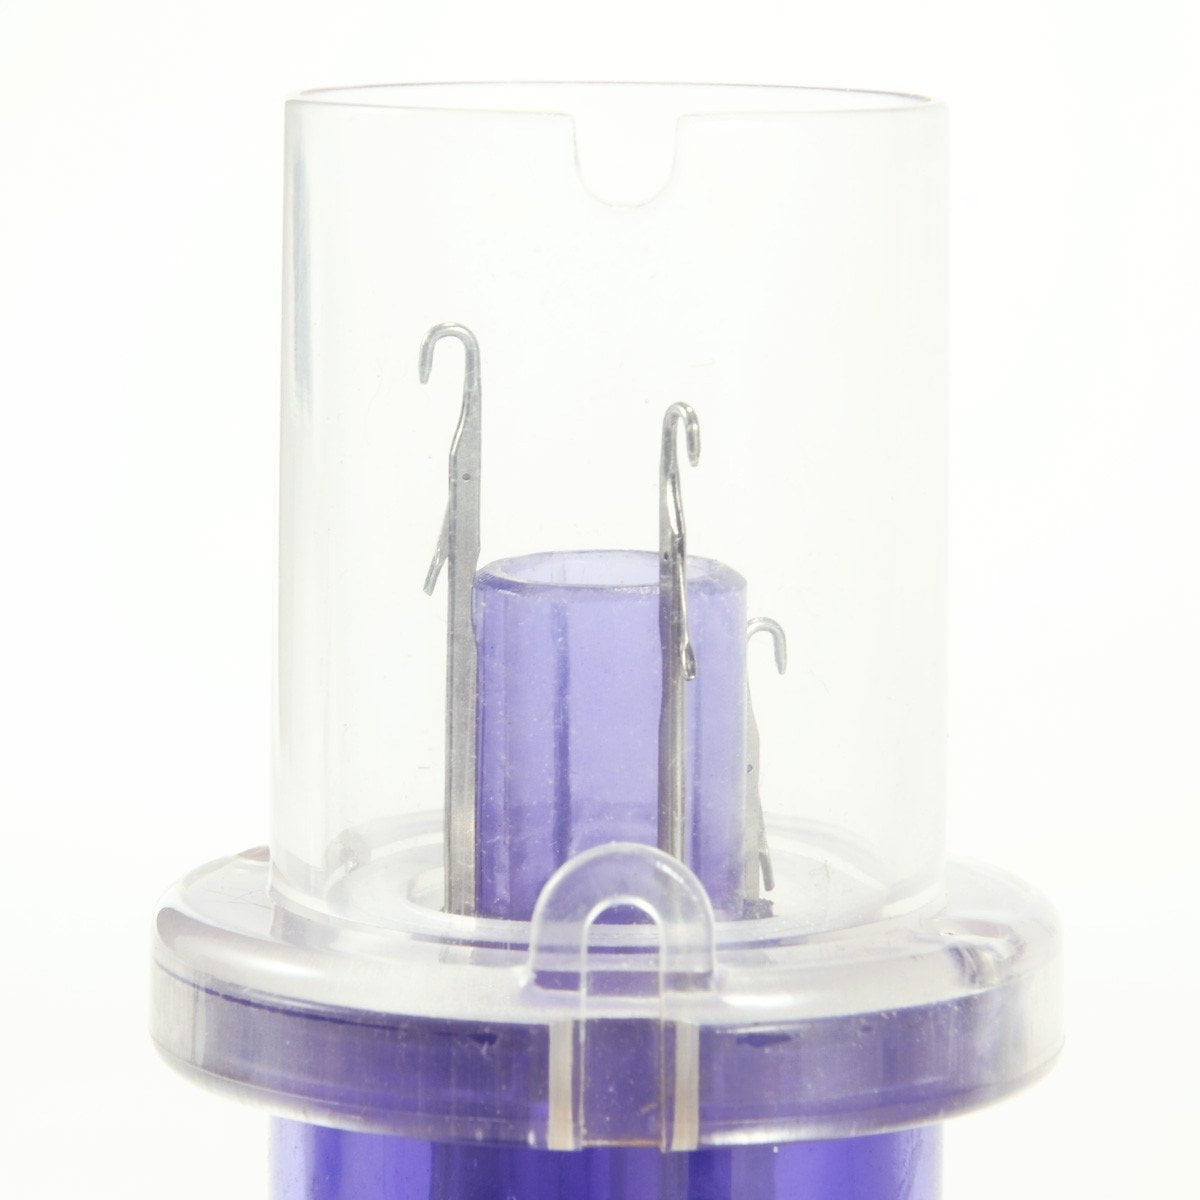
The item is a simple and practical mini knitting machine, which is mainly made of durable hard plastic and metal materials, and easy and funny to DIY create the knitting jewelry.
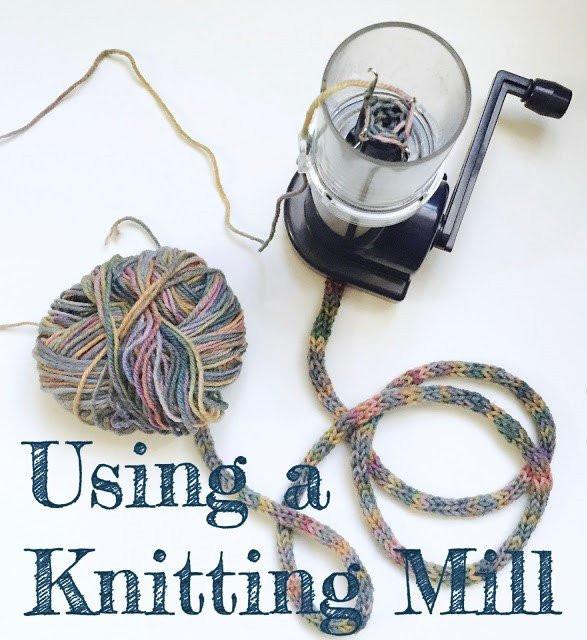
Full instructions included, just insert the thread, attach the included weight and turn the crank.
Features:
- 100% brand new and high quality DIY Hand Knitting Mill Mini Knitting Machine.
- Easy and funny to DIY create the knitting jewelry!!
- Full instructions included, just insert the thread, attach the included weight and turn the crank.
- Simple and practical design, and easy to operate.
- Material: durable hard plastic and metal.
Package Including:
- 1 * DIY Hand Knitting Mill Mini
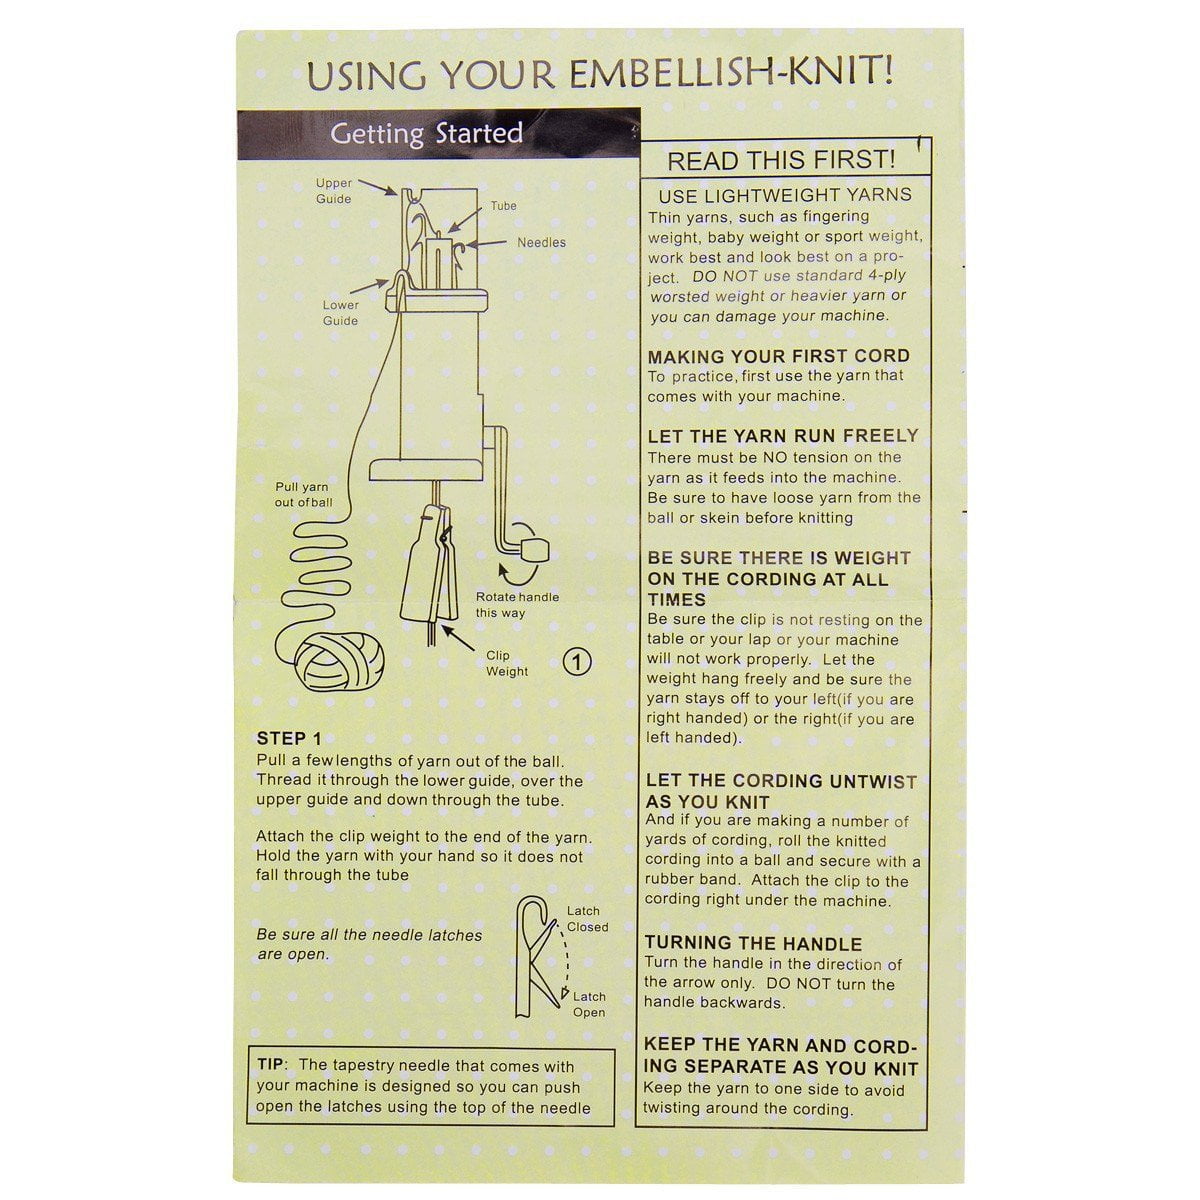
How to use
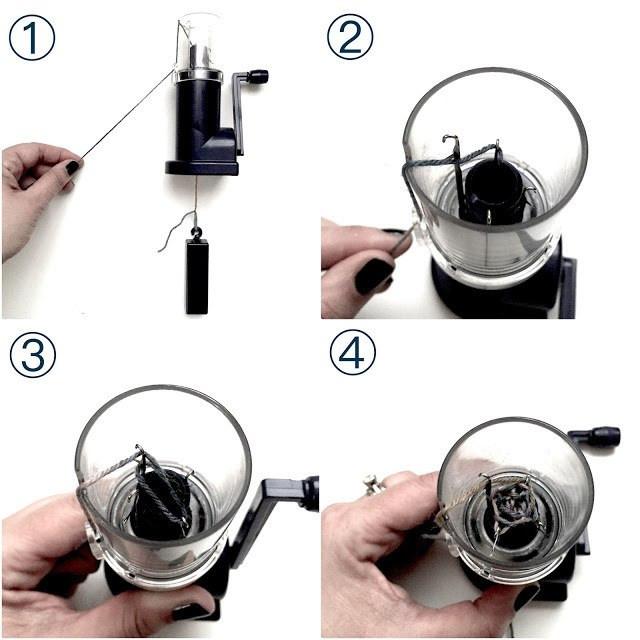
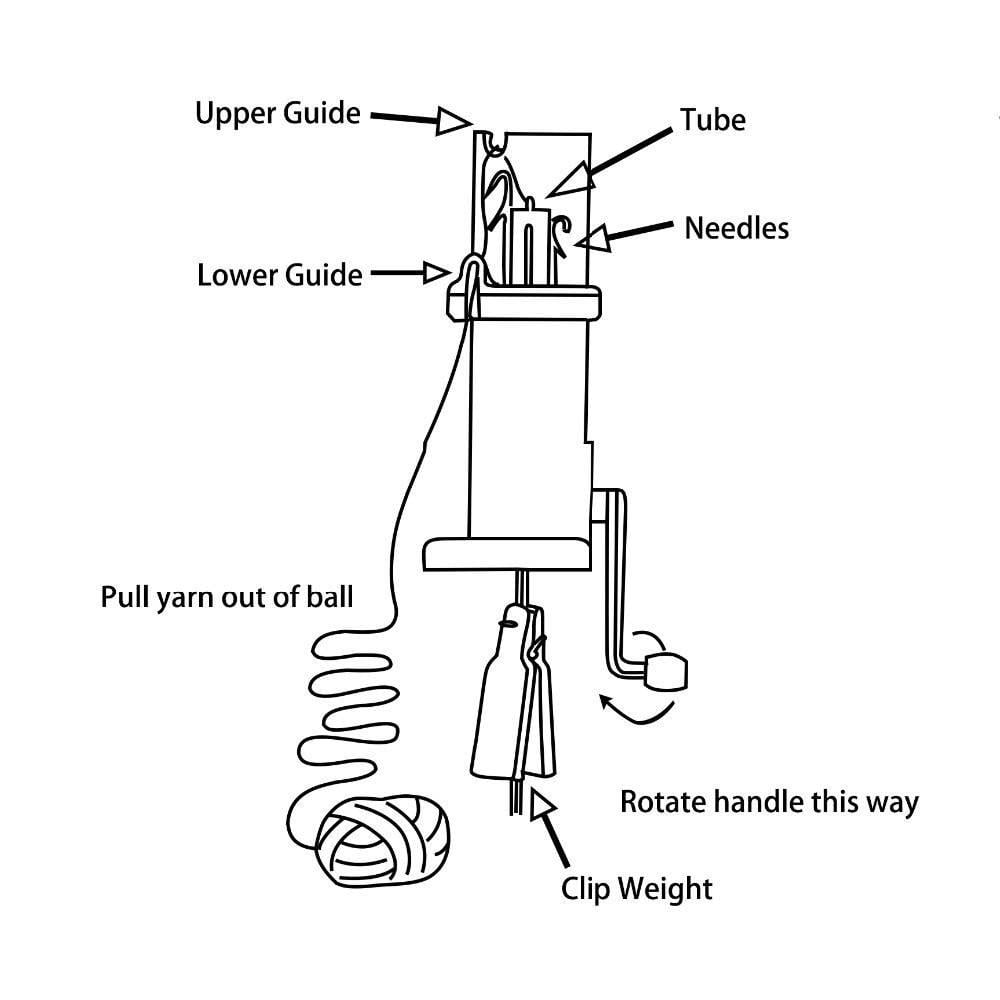
1. Pull a few lengths of yarn out of the ball. Thread it through the lower guide, over the upper guide and down through the tube. Attach the clip weight to the end of the yarn. Hold the yarn with your hand so it does not fall through the tube.
2. Turn the handle slowly in the direction of the arrow (where the handle attaches to the machine) until the first needle catches the yarn.
3. Continue turning the handle slowly. Push the yarn behind the second needle using the top of your tapestry needle. Continue turning the handle until the third needle catches the yarn.
4. Continue turning the handle, pushing the yarn behind the fourth needle and continue turning the handle until the first needle catches the yarn again. Be sure the stitch slips down the latch. If it does not slip down on its own, push it below the latch using the top of the tapestry needle to your finger.
5. Continuse turning the handle slowly until every needle has caught the yarn. Pull down on the yarn coming out or the bottom of the machine every couple turns at the begining to make sure all the stitches has been formed. Soon the yarn will start to come out of the bottom of the tube. Move the clip up as needed.
| Weight | 1.0 oz |
|---|
Related products


CraftsCapitol™ Premium Knitting Tote Bag Travel Yarn Storage
Price range: $27.99 through $29.99


CraftsCapitol™ Premium Needles Knitted Machine
Price range: $39.99 through $75.99


